
|

|
|
|
Matt Dralle's RV-8 Project
|
Date: 6-16-2009
|
Number of Hours: 1.50
|
Manual Reference:
|
Brief Description: Left Bell Crank Installation - Part 1
|
|
The left and right aileron bell crank installations are pretty straight forward. The hardest part is probably getting the bronze bearing insert filled off to just the right length so that the bell crank rotates smoothly around it, but so that there is a minimum of up/down play in the bell crank. It took a couple of tries on the left side, and I somehow got the right side perfect on the first try. The left side was about 1/32 too long, so I had to disassemble the whole thing and remove all the grease before I could file it down a bit more.
Here's a tip for the Quick Builders out there on this installation. In the QB spar assembly, they add the top and bottom mounts for you. The problem is that with those mounts installed, there's no way to get the long, 1/4" bolt inserted. There's just not enough clearance. After I elongated the top mount hole with a drill, and then decided that wasn't the right answer (and a new part later), I realized that, duh, you can unscrew the bolts that hold the mounts to the spars and then the whole thing bolts together very nicely. I guess I appreciate them preinstalling the mounts the QB, but I think it would be less confusing if they just left them for the builder to do. IMHO.
The push rods attached nicely and the movement is super, super smooth with no slop or backlash. Very cool.
|
|
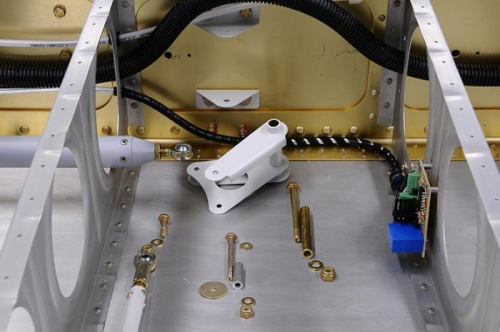
Left Bell Crank - Ready For Assembly
|
|
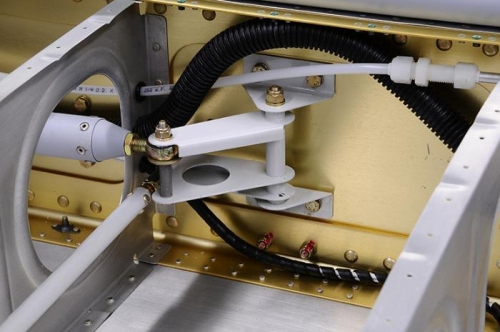
Left Bell Crank - Full Down Aileron
|
|
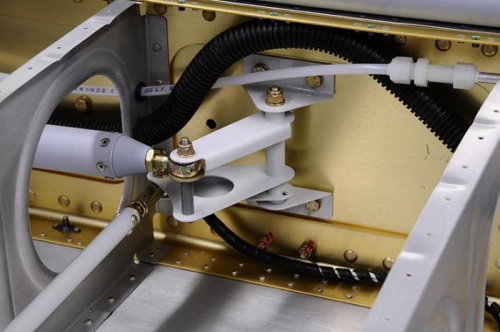
Left Bell Crank - Mid Aileron
|
|
|
|
|
|
|
|
|
Copyright © 2008-2024 Matt Dralle. All Rights Reserved.
|